The notes to the financial statements describe the accounting principles and provide more detailed information on the items in the profit and loss statement and balance sheet. Additionally, the notes are complemented by non-monetary information about the company. Depending on the size of the company, the notes also include a funds statement, which details the sources and uses of funds during the financial period.
CONTENT
- Selecting the notes report
- Initializing the notes report
- Replacing the report
- Editing the notes report
- Attachment data documents
- FAQ
- Frequently asked questions
Selecting the notes report
Open the notes to the financial statements by selecting Financial Management > Bookkeeping > Financial statements.
- In the Selected period section of the view, select the financial period whose notes you want to add or edit.
- Open the notes report by selecting the Notes to the financial statements (New) link or
- include the notes report in the financial statements by selecting the Include button for the report.

Initializing the notes report
- Go to the notes report for the first time. The program asks which template to use when opening the report.
- Select the desired template from the dropdown menu:
- blank report template (default) (1.)
- system template PMA Notes to the financial statements (Ltd) for limited companies (2.)
- notes made with the old template from the previous financial period (3.)
- notes from the previous financial period (4.)
- any interim financial statement notes (5.).

If you select the wrong template at this stage and the report is formed, for example, as empty, reinitialize the report as follows:
- Open the report settings.
- From the three dots menu in the settings, select Initialize report with template.
- Select the desired template and confirm.

Use backup as follows:
- Select whether a backup is created from the completed report.
- Backup creates the report in the Other report templates section of the Financial statements view.
- Bring the backup back to the actual financial statements reports if needed.
- Note that attachment data documents are not transferred to the copied report.
 Replacing the report
Replace an existing report with your own .pdf file as follows:
- Find the desired report in the Financial statements view.
- Select the replace link for the report.
- Select the desired .pdf report from your computer.
- Attach the selected report to the composition view in place of the previous report.
If the notes report is at the bottom of the view under the Other financial statements reports report templates and you want to move it to replace the Notes to the financial statements version, proceed as follows:
- Go to the company from which the report template is copied.
- Select Copy report templates.
- Select the same company as the target company and select the template to be copied.
- On the next page, select:
- the replacement action
- the template to be replaced (upper row notes template).
Note the following when replacing the report:
- The structure is copied over the upper template.
- Pre-entered values and texts disappear.
- The name of the notes report does not change when copied, but you can edit the name:
- Open the report.
- Select Edit report template settings.
- Change the desired name in the Description field.
- The notes template at the bottom remains after copying.
- Delete the notes template at the bottom after a successful copy:
- Open the notes template at the bottom.
- Make sure that the report is in not included status.
- Select Delete report template.
- The notes to be copied can be in not included, in progress, or ready status. This does not matter for copying.
- The notes report onto which the copy is made must not be in ready status. Otherwise, the data will not be copied to it.
- If the report is in ready status during copying, the changes become visible only when you:
- take the report out of ready status
- change it to in progress status.
- The report may change significantly when you start editing it after copying.
NOTE! To calculate the profit/loss for the financial period in the notes values, close the financial period before calculating the notes. By default, the previous financial period's template is used.
Editing the notes report
Open editing of the notes report by selecting Financial Management > Financial statements > Notes to the financial statements (New).
Report settings
When you open the notes report, the Report settings view is displayed. In the view you see:
- the selected financial period
- the comparison period
- information about the latest report calculation.
Proceed with the orange triangle as follows:
- If an orange triangle is displayed in the report settings, changes have been made to the bookkeeping after the previous calculation or the report has been manually edited.
- Check the report information.
- Recalculate the report if necessary.
Access additional functions from the report settings as follows:
- Open the notes report.
- Select the three dots menu in the report settings.
- Select the desired function from the options below.

Copy report template:
- Select Copy report template.
- Select the report template to be copied.
- Select the company or companies to which the report template is copied. You can select multiple companies by holding down the Ctrl key and selecting companies from the list.
- Confirm the selection.
- In the next view, select:
- whether to create a new report template or
- whether to replace an existing report template.
- Select whether to copy:
- user-entered headers
- specification headers and descriptions of amounts
- specifications and amounts.
- Confirm copying. The report is copied from the active company.
Save as:
- Select Save as.
- Save a copy of the report in the same company, for example as a backup or template.
- Note that all report content is copied, except for attachment data documents.
- Find the copy in the Report templates section at the bottom of the Financial statements page.
- Open the copy. The copy opens in a new tab after saving.
List attachment data documents:
- Select List attachment data documents.
- View the attachment data documents used in the company in the list.
Renumber attachment data documents:
- Make sure that the notes are in in progress status.
- Select Renumber attachment data documents.
- Let the system renumber the attachment data documents again in the order of entry.
- Note that renumbering applies only to the attachment data documents of the selected period.
Settings:
- Select Settings.
- Change the name of the notes form if necessary.
- Select whether comparison data from the previous period is displayed on the form.
Initialize report with template:
- Select Initialize report with template.
- Select the desired template in the opening view.
- Confirm initialization.
Note! When you initialize the report with a template:
- the current report is cleared
- texts, figures, and attachment data documents are removed
- the selected template is loaded in its place.
Editing header rows
Edit the notes at header level as follows:
- change row specifications
- select whether Netvisor calculates the values of the row from the bookkeeping based on a formula
- change the visibility of rows
- change the position of rows.
Follow the rows to see what type of row it is.
Adding a header row:
- Go to the notes report.
- Select the report template button + Add main header.
- Enter the details of the new main header.

Adding a subheader:
- Select the + button under the desired main header.
- Select Subheader from the options.
- Enter the details of the subheader.

Editing a subheader:
- Put the main header in edit mode by selecting the pencil symbol at the main header level (1.).
- Open the subheader functions by selecting the three dots menu of the subheader (2.).
- Select the desired function:
- Move under another header: move an existing row under the desired header in the report.
- Add attachment data document: open a view where you can provide a description for the attachment data document and search for the desired voucher from the bookkeeping.
- Delete content: delete the subheader. Alternatively, you can hide the content, allowing you to restore it to visibility later.

Edit the content of the header level section as follows:
- Select the + button at header level.
- Select the desired content type from the opening menu.

- Specification:
- Create a free text field in the selected section.
- Add free-form text to the field manually.
- User-entered amount:
- Create a free text field and numerical fields in the selected section.
- Add free-form content and amounts to the fields.
- Account balance:
- Create an Account balance field in the selected section.
- Open the Account balance view and define the following:
- Select account or account group:
- Select the accounts or account groups whose balances are included in the calculation.
- Add a new account or account group by selecting Add account.
- Remove an account or account group from the calculation by selecting the red cross at the end of the account row.
- Calculation:
- Select whether the given account range is calculated as:
- opening balance
- change
- closing balance.
- Select whether the given account range is calculated as:
- Summation level:
- Header: show the calculated balance of the account range only at header level.
- Account: detail the balance as account-level rows without calculating the total sum of the account range.
- Follow-up object: detail the account balance by follow-up objects.
- Define account follow-up headers in the Follow-up objects section of the Financial statements menu.
- Read more in the Follow-up object guide.
- Displayed rows:
- Select to display the opening and/or closing balance.
- Note that opening balances are calculated only from accounts belonging to the balance sheet group.
- Sign of income/expenses:
- Select Reverse sign in calculation if you want to change a positive value to negative and a negative value to positive.
- Confirmation:
- Confirm the selections by selecting Set.
- Select account or account group:
- Page break:
- Create a page break in the selected section.
Edit existing records at header level as follows:
- Select the pencil button at header level.
- Edit the desired information in the opening view.
- Save the changes.

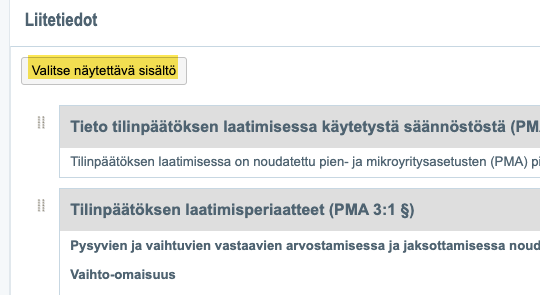
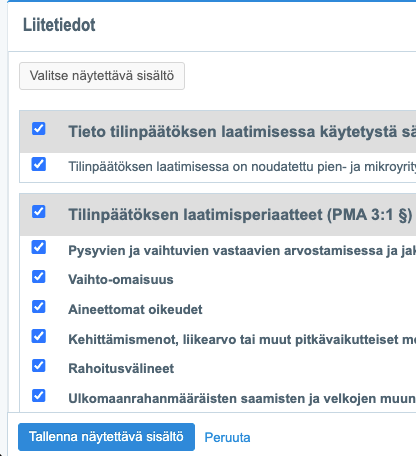
Visibility of attachment data rows:
Select the visibility of attachment data rows as follows:
- Select the Select visible content button.
- Select the desired rows to be visible in the notes.
- Save the visible content.
- Note that rows left unselected remain hidden.
Attachment data documents
Use attachment data documents when you want to bring into the notes, for example:
- lease agreements
- personnel numbers
- debt instruments
- other information relevant to the financial statements.
Note the following about attachment data documents:
- Define the necessity of the notes separately for each company.
- Add and manage attachment data documents only through the notes report.
- List attachment data documents from the notes report or through bookkeeping reports.
- Attachment data documents are printed in the financial period archive:
- as part of the balance sheet specification or
- as their own report in the financial statements, depending on what is selected in the financial statements settings.
- Attachment data documents are included in the material copy service.
Adding an attachment data document
Add an attachment data document to a row as follows:
- Go to the notes report.
- Find the desired row and column.
- Select the + button for the column.
- Select Attachment data document.

Add an attachment data document through edit mode as follows:
- Put the desired column in edit mode by selecting the pencil button.
- From the three dots menu, select Add attachment data document.
- Enter a description for the attachment data document and select the required data.

Editing/deleting an attachment data document
Edit or delete an attachment data document as follows:
- Open the notes report settings.
- Select List attachment data documents.
- Open the desired attachment data document by selecting the number of the attachment data document.

Edit the attachment data document in the opening view as follows:
- Select the Edit button.
- Edit the description of the attachment data document.
- Add attachments by dragging files into the view or by searching them from files.
- Delete the document by selecting the delete link or
- invalidate the document by selecting the invalidate voucher button.
- Copy the document if necessary by selecting the copy function.
Note that editing leaves a trace in the document's change history.
Attachment data documents in bookkeeping reports
Display attachment data documents in bookkeeping reporting as follows:
- Open bookkeeping reporting.
- Select attachment data documents as the report format.
- Select that attachments are also opened visible in the report.

Display attachment data documents added to the new report template as follows:
- Open bookkeeping reporting.
- Select Notes to the financial statements (New) from the report dropdown menu.
- View the attachment data documents that appear on the report.

FAQ
How do I remove the new notes report template from the financial statements?
Proceed as follows if you have chosen to use the old notes report template and want to remove the new report template from the financial statements:
- Open the new notes report template.
- Set the report template to in progress status.
- Note that only a report set to ready status is included in the actual financial statements.
- Make sure that the desired report set to ready status is included in the financial statements material.
Frequently asked questions
Q: Where can I find the notes to the financial statements in Netvisor?
A: Open the notes to the financial statements by selecting Financial Management > Bookkeeping > Financial statements and then Notes to the financial statements (New) or by including the notes report with the Include button.
Q: How do I select or change the template for the notes report?
A: When you open the notes report for the first time, select the desired template from the dropdown menu (for example, a blank template or PMA Notes to the financial statements (Ltd)). If you select the wrong template, open the report settings, select Initialize report with template from the three dots menu, and select a new template.
Q: How can I back up the notes report?
A: Use the Save as function in the report settings. A copy of the report is created in the Report templates section of the Financial statements page. Note that attachment data documents are not transferred to the copy.
Q: How do I replace the notes report with my own .pdf file?
A: In the Financial statements view, select the replace link for the desired report, select the .pdf file from your computer, and attach it to the composition view in place of the previous report.
Q: How do I move the notes template at the bottom to replace the main Notes to the financial statements version?
A: Select Copy report templates, select the same company as the target company and the template to be copied, and in the next view select the replacement action and the upper row notes template as the template to be replaced. Delete the notes template at the bottom after copying has succeeded.
Q: Why is the profit/loss for the financial period not shown in the notes values?
A: Close the financial period before calculating the notes. The profit/loss for the financial period is calculated in the notes values only after the financial period has been closed. By default, the previous financial period's template is used.
Q: How do I edit the headers and rows in the notes?
A: Add a main header by selecting + Add main header, add a subheader under a main header with + > Subheader, edit headers and rows with the pencil button and the three dots menu, and select row visibility with the Select visible content button.
Q: How do I add an attachment data document to the notes report?
A: In the desired row's column, select + > Attachment data document, or put the column in edit mode with the pencil button and select Add attachment data document from the three dots. Enter a description and select the required data.
Q: How do I edit or delete an attachment data document?
A: Open the notes report settings, select List attachment data documents, open the document from its number, and select Edit. Edit the description and attachments and, if necessary, delete or invalidate the document. Changes are recorded in the change history.
Q: How do I display attachment data documents in bookkeeping reports?
A: Open bookkeeping reporting, select attachment data documents as the report format, and select that attachments are opened visible in the report. You can view attachment data documents for the new report template by selecting Notes to the financial statements (New) as the report.
Keywords
notes to the financial statements, notes report, notes report template, PMA Notes to the financial statements (Ltd), financial statements, Financial statements view, report template, initializing the report, replacing the report, report settings, Copy report template, Save as, attachment data document, attachment data documents, adding an attachment data document, editing an attachment data document, deleting an attachment data document, attachment data documents in bookkeeping reports, Account balance, follow-up object, report templates, backup, financial period archive, balance sheet specification, material copy service, ready status, in progress status, not included status, Notes to the financial statements (New)
Did you find it helpful? Yes No
Send feedback